This somewhat extreme process works well for us but may not work as well for you. Water conditions, filtration, type of fish, substrate, lighting and other factors can have an effect on the process.
Why We Are Doing It
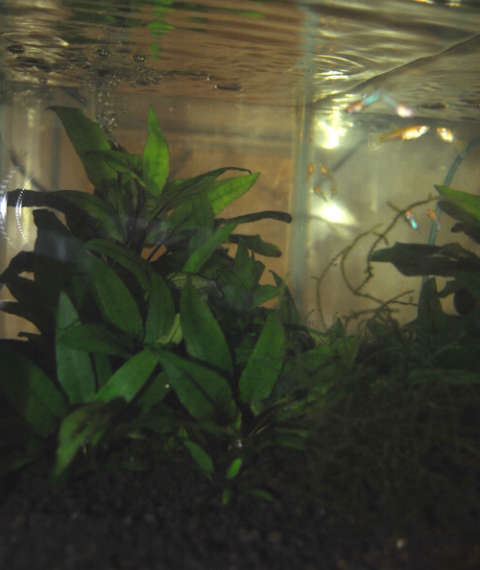
This 12-gallon aquarium has become overcrowded with fish and plants and has become somewhat unsightly.
Allowing the aquarium to become too overcrowded with fish has also resulted in an algae bloom. Algae starting to coat the leaves of many of the plants indicating that the water condition is less than ideal.
We haven’t done any real maintenance on this aquarium for over a year. It’s now time to break down the aquarium and divide the plants. We will use the excess plants to set up a new aquarium and add plants to other tanks.
The Aquarium
An aquarium set up in this manner requires little or no maintenance.
Over the years we have been able to set up several more aquariums using the plants harvested from this tank.
We shared a post about how this tank is set up in an earlier post called: Our Favorite Aquarium (The Low Tech Planted Tank)
We really enjoy this set up as maintenance is minimal and the fish do remarkably well. Replacing evaporated water and scrubbing the glass once and a while is all we have had to do since harvesting the plants over a year ago.
Our Endlers do well in this tank. We have never had an illness of any kind in this aquarium.
Harvesting plants in this aquarium create major changes to the biosystem. For a few weeks it will require a small amount of maintenance until the aquarium stabilizes again.
How This Aquarium Setup Works
Substrate and a mechanical/biological filtration system help break down ammonia and nitrites into less harmful nitrates. The plants can then use the nitrates as a food supply.
While this is our favorite type of aquarium setup by no means is it perfect. Fish to water to plant ratios are difficult to match those found in nature due to the limited size of aquariums.
We maintain a high concentration of plants and use a thick layer of substrate that helps cultivate as much beneficial bacteria as possible. Keeping the number of fish low helps prevent the biosystem from becoming overwhelmed.
We have attempted to do a similar setup in some of our other tanks however we have found that the filtration systems are not sufficient to make the system work as well as it does in this specialized tank and has found it necessary to do partial water changes on a regular basis in those aquariums.
The Aquarium Plants We Keep
Plants in this aquarium do well in low light conditions and require no special care. The plants we keep in the aquarium are Dwarf Anubias (Anubias nana), Java Moss (Taxiphyllum barbieriand), Wendtii Green (Cryptocoryne wendtii).
We find that the Anubias Nana is very slow growing and tends to collect little algae. The algae doesn’t bother us as the purpose of this tank is to provide the best possible environment for our fish and not necessarily to make it look good.
The Goal
Our goal during this time is to thin out the plants for use in other tanks, move some of the Endlers to a different tank and remove as much debris as possible while preserving much of the beneficial bacteria in the aquarium.
A couple of months earlier we set up an additional tank for the extra fish.
Setting Up
A day before starting the process we set up five 5 gallon buckets. Two of the buckets are filled 2/3 full of water and left for the day to release chlorine and to get the water to room temperature.
This water will be used to replace the water that is removed from the tank. 1/3 of the bucket is left empty in order to add water just prior to adding to the tank in order to adjust the final temperature.
One of the other buckets will be used to save 1/3 of the water to add back to the aquarium. This bucket is also used to hold the plants and fish before they are moved. The fourth bucket is used to hold another 1/3 of the old aquarium water to rinse off items in the tank. The final five-gallon bucket is used to drain the rest of the aquarium.
We also use a small container to hold the fish we want to move into another aquarium when we are finished.
The process also requires the use of a siphon hose, a pair of scissors and water conditioner designed to remove chlorine or chloramine. We use Prime® as it removes chlorine, chloramine, and ammonia. Because the substrate we use degrades a little over time we also have some new substrate ready as well.
Starting The Process
The first thing we do is use a thermometer to check the water temperature (78° F at this time). Next, we unplug the water heater. Don’t forget this important step. Leaving the water heater on will likely result in a broken water heater during the process.
Hot or cold water is added to the buckets that will be used to refill the aquarium to get the temperature to match the temperature of the water in the aquarium as closely as possible. At this point add water conditioner to the water following the manufacturer’s directions (we use Prime®).
Draining The Tank
We then siphon off approximately 1/3 of the water out of the aquarium being careful not to stir up anything in the tank so that the water entering the bucket is as clean as possible. Once the 1/3 of the water is in the bucket we move the siphon hose to another bucket to drain off enough water to leave the aquarium about 1/3 full. Removing too much water makes it more difficult to catch the fish that remain in the aquarium.
We then remove all the plants from the aquarium and place them in the 5-gallon bucket of original aquarium water that has the most in water in it. The Cryptocoryne wendtii have very long root systems so care must be taken to prevent the plant from breaking off at the root. Next, we remove all other aquarium decorations and place them in the other bucket. We try not to disturb the gravel when removing the plants and decorations so that it is less stressful on the fish and easier to see them when we wish to remove them.
Removing The Fish
We give the water a little while to clear up and then we remove the fish. This seems to be the most difficult part of the entire process. The fish we want to add back to the tank when we are finished are placed in the bucket that we put the aquarium plants into.
The rest of the fish are placed in a small container to be transferred into the tank we previously set up and cycled. When we have finished the extra plants we had left over went into that tank and any other aquariums that need more plants.
Cleaning The Filter
The filter media is then removed and cleaned using the water from the bucket that has the original aquarium water and aquarium decorations in it.
Never use any type of cleaning supplies to clean the tank or decorations as it may leave a toxic residue.
By using the original aquarium water to clean the filter material and decorations we help prevent the beneficial bacteria from being killed.
The filter media is cleaned by squeezing it multiple times in the water. We use a soft scrubbing pad or clean toothbrush to clean off the decorations where needed.
Scrubbing The Glass
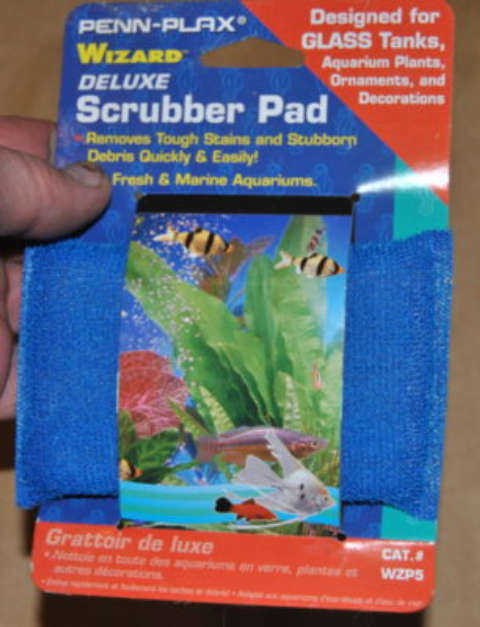
At this point, the only thing left in the tank is the aquarium substrate. We use a soft scrubbing pad (chemical free) to clean the glass at this point. Some scrubbing pads can scratch aquarium glass. We purchased this tank second hand and it has quite a few scratches in the glass already.
Special care should be used when cleaning plastic or acrylic aquariums. For those tanks that are likely to scratch we usually use a microfiber washcloth to carefully clean them.
Avoid using scrubbing pads that are attached to a sponge that are designed to clean dishes and kitchen surfaces as these often contain chemicals that kill bacteria, mold, and mildew and would be harmful to the fish.
Cleaning The Substrate
Once the glass has been cleaned we vigorously stir the substrate to mix as much waste into the remaining water as we can. We then quickly siphon off the remaining water into an empty bucket while stirring to remove as much waste and debris as possible.
If needed we pour a small amount of the fresh water into the aquarium and stir the gravel once more. We again siphon off as much water as possible while stirring.
The substrate is not completely clean at this point but that’s okay. A small amount of waste left in the substrate is desirable so that there is still plenty of beneficial bacteria left in the aquarium.
Putting Things Back Together
Once the cleaning process is done we then start putting the aquarium back together. Because the substrate that we use degrades over time we add some new clean substrate to the tank.
We like to have at least 2” of the substrate to maintain lots of beneficial bacteria in the aquarium.
The filtration system is then put back in place and then the decorations are placed back in the tank. In such a small tank it’s easier for us to completely fill the tank before adding the plants back into the tank.
We fill the tank with our reserved water that has the fish in it and the fresh water we set aside. The plants are placed in a bowl so that we can work on them. We then fix the substrate that is disturbed during the process.
The water is usually a bit cloudy at this point as it still contains some sediment from the cleaning process. We allow the water to settle while we work on the plants.
Harvesting The Aquarium Plants
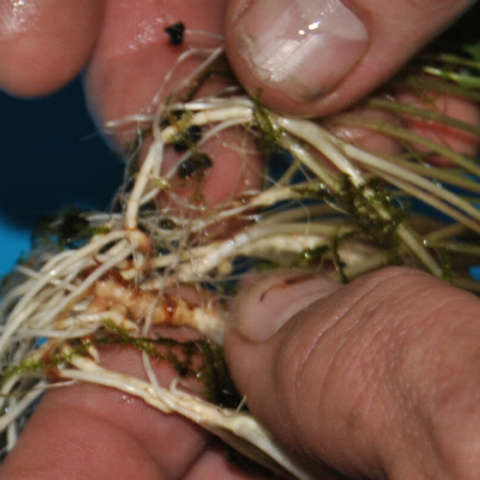
Before adding the plants back into the aquarium we thin out the Cryptocoryne wendtii by separating them at the base of the plant where the roots start to grow.
Special care is needed when pulling the plants apart from each other to prevent breaking the plant away from the root. If this happens, go ahead and plant the root once again as it will likely grow back into a healthy plant.
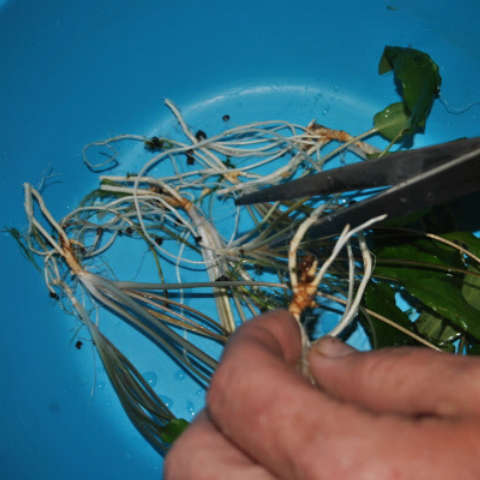
After carefully pulling the plants away from each other we use a pair of scissors to trim the roots until they are around 1″-1 1/2″ in length. Trimming of the roots is not necessary however it helps make it easier to replant them into the substrate.
While trimming the roots we also trim off any leaves that may have excessive algae growth on them. We don’t trim any of the roots from the Anubias nana.
As the plants are trimmed tweezers are helpful when replacing the plants back into the aquarium until we are happy with the number of plants in the tank. We also thin out the Java Moss by pulling out a small amount to add back to the tank.
The Anubias nana is carefully scrubbed with a soft toothbrush or scrubby to remove excess algae and are then added back to the aquarium. Algae can also be removed by carefully rubbing the leaves between your fingers.
Only plant the small roots of the Anubias nana in the substrate and being careful not to cover the rhizome with the substrate because it will rot and the plant will die. The small roots can also be tied to rocks or other decorations in the tank using fishing line or nylon thread.
The extra plants that are left over are trimmed and placed in another aquarium after we finish working on the aquarium that is being cleaned.
Finishing Up
We turn the aquarium heater back on and make sure everything is running normally at this point. After the water has had time to settle and the water has cleared a bit we use the handle of a net to brush any sediment off the leaves of the plants. Anything left on the plants will quickly encourage algae growth.
If needed we repeat the process of cleaning the leaves of the plants an hour or so later. There is usually some sediment on the surface of the substrate however in a few days the sediment disappears on its own.
The bucket of leftover plants, water and fish is then added to a newly cycled tank.
Follow Up With Additional Care
Depending on how long we leave the lights on and the bio-load caused by the remaining fish, there may be an algae bloom a few days to a few weeks after the water change is made. Algae growth can usually be controlled by reducing the amount of light the aquarium receives.
If there is an extreme amount of algae or if there is any sign of Black Beard algae we use Flourish Excel to get it under control. Small amounts of spot algae is normal and gives our Endlers something to snack on between feeding times and when we are away.
Flourish Excel is sometimes refered to as “liquid carbon” however we have found it’s best uses is that of a algicide. It is a little rough on some of our plants so we don’t use it very often.
This is the most critical time for the aquarium as it adjusts to the changes that have been made. Pay special attention to the aquarium to be sure there are no ammonia spikes or any other issues for a few weeks.
It’s important to make sure that there are only a few fish left in the tank as it cycles and as the plants re-root themselves. After a few weeks the aquarium balances itself out again and there is again little to no maintenance needed.
The Completed Project
The aquarium was left with approximately 1/3 of the plants placed back into the tank. The rest of the plants are used in other aquariums.
Originally there were over 40 adult Endlers and at least as many fry in the aquarium. The number of fish was reduced to under 10 adults and juveniles as well as a handful of fry.
While the aquarium looks somewhat bare compared to what it used to look like it should bounce back quickly and be green and lush once more in a few months.